
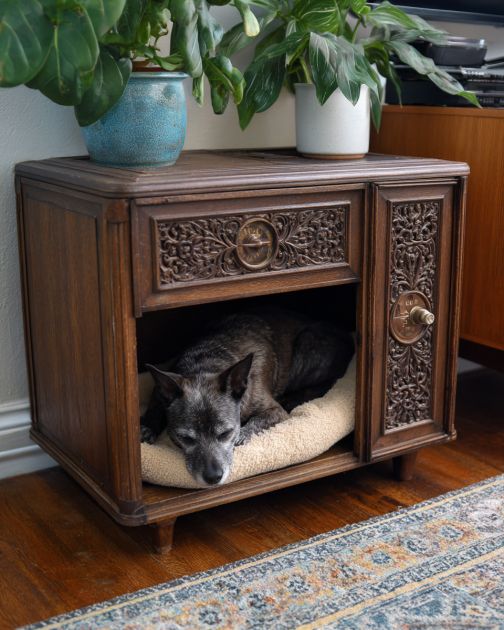
In a world where sustainability and upcycling have become more than just trends, turning outdated electronics into something beautiful and functional is a creative and eco-friendly project. Repurposing vintage TV cabinets into stylish and comfortable pet beds not only gives a new life to an otherwise discarded item but also adds a unique touch to your home decor. This DIY project is perfect for pet owners who love the charm of retro furnishings and want to create a cozy nook for their furry friends.
This DIY pet bed can be styled to match any interior design theme. For a mid-century modern look, consider keeping the natural wood finish and pairing it with a geometric cushion in muted tones. If your home has a more eclectic or bohemian vibe, add a bright, patterned cushion and some decorative tassels or fringe. The pet bed can be placed in a living room, bedroom, or even a sunroom, providing a cozy spot for your pet while also serving as a conversation piece.
Vintage TV Cabinet Pet Bed
Materials
Vintage TV cabinet (dimensions will vary)
Cushion or foam insert (cut to fit the interior of the cabinet)
Fabric for covering the cushion
Sandpaper (medium and fine grit)
Wood paint or stain (optional)
Paintbrush
Screwdriver
Wood glue
Scissors
Staple gun and staples
Optional: Decorative elements like trim, tassels, or stencils
Directions
Start by removing the TV screen and any internal components of the cabinet using a screwdriver. Be cautious with glass and electronics.
Sand down the interior and exterior surfaces of the cabinet to remove any rough edges or old varnish. Use medium grit first, followed by fine grit for a smooth finish.
If desired, paint or stain the cabinet. Allow it to dry completely before proceeding.
Measure the interior space of the cabinet to determine the size of the cushion or foam insert needed.
Cut the foam to size if necessary, and cover it with fabric. Use a staple gun to secure the fabric tightly around the foam.
Place the cushion inside the cabinet, making sure it fits snugly.
Add any decorative elements to the exterior of the cabinet, such as stencils, trim, or tassels.
Position the pet bed in your desired location and invite your pet to enjoy their new cozy retreat.
Variations & Tips
There are numerous ways to personalize this DIY project. For a more rustic look, leave the wood in its natural state or apply a weathered finish. To add a touch of whimsy, consider painting the cabinet in bold colors or adding decals. You can also experiment with different types of fabric for the cushion, like faux fur for extra coziness or waterproof material for easy cleaning. For those with multiple pets, consider stacking two cabinets to create a bunk bed arrangement. The possibilities are endless, and this project can be adapted to suit any pet size, from small cats to large dogs.
