Creating your own home decor from natural materials not only brings a touch of the outdoors inside but also allows for a personalized and sustainable approach to decorating. By using tree branches collected from your own yard, you can craft a unique piece that adds character and warmth to any room. This DIY project is perfect for those who appreciate rustic, natural aesthetics and want to incorporate a bit of nature into their living space without spending a fortune.
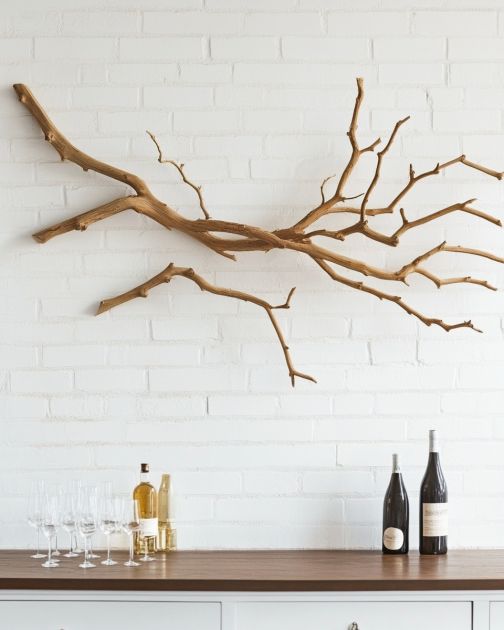
This DIY decor piece can be styled in various ways to complement different interior design themes. For a minimalist look, place the finished decor against a plain white wall to let its natural beauty stand out. In a rustic or farmhouse-style home, pair it with other natural elements like woven baskets, wooden furniture, and soft textiles. You can also use it as a centerpiece on a dining table or as a statement piece above a fireplace to draw attention and create a cozy atmosphere.
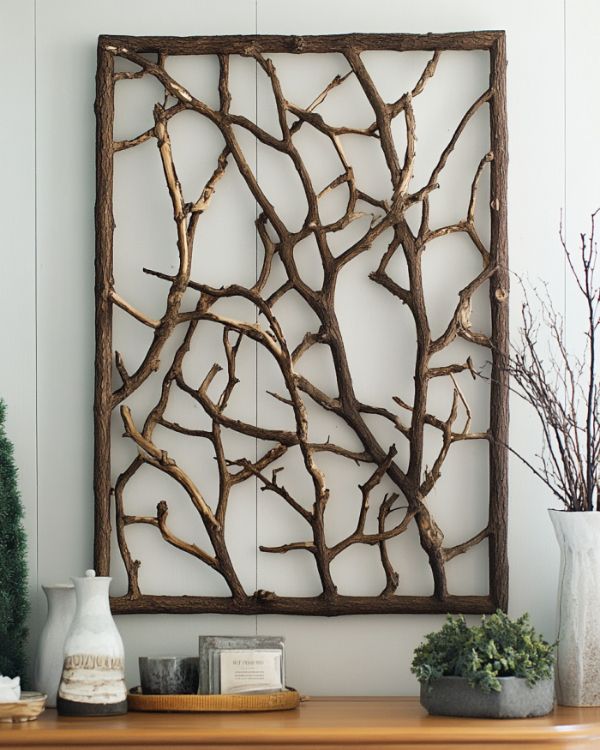
Rustic Branch Wall Art

Materials
Several tree branches (varying lengths and thicknesses)
Pruning shears or a small saw
Sandpaper (medium grit)
Wood stain or paint (optional)
Clear sealant spray
Strong adhesive or a hot glue gun
Picture hanging hardware
Measuring tape
Pencil
Directions
Collect branches from your yard, choosing ones that are straight and free of rot or damage.
Use pruning shears or a small saw to cut the branches to your desired lengths, ensuring they fit the space where you plan to display them.
Sand the branches to remove any rough edges or bark, creating a smooth surface.
If desired, apply wood stain or paint to the branches to match your decor. Allow them to dry completely.
Spray the branches with a clear sealant to protect them and enhance their natural beauty.
Arrange the branches on a flat surface, experimenting with different layouts until you find one you like.
Use strong adhesive or a hot glue gun to attach the branches together at contact points, securing the arrangement.
Once the glue has dried, attach picture hanging hardware to the back of the arrangement.
Measure and mark the spot on your wall where you want to hang the decor, then mount it securely.
Final Looks
Variations & Tips
To customize this DIY to your personal taste, consider experimenting with different finishes. For a more modern look, paint the branches in a monochromatic color scheme or use metallic spray paint for a touch of glamour. You can also incorporate additional elements like fairy lights, small hanging ornaments, or even dried flowers to add more visual interest. If you prefer a more structured design, arrange the branches in a geometric pattern or create a framed piece by attaching them to a wooden backing.
