It’s New Year’s weekend, and amidst the celebrations, you notice an odd occurrence in your bathroom: your toilet seems to refill itself randomly. This can be perplexing, especially since finding a plumber during the holidays can be a challenge. Before you panic, it’s important to understand that this issue is common and often easy to address with a bit of DIY troubleshooting.
In this article, we’ll explore the reasons behind your toilet’s spontaneous refills and guide you through some simple steps you can take today to diagnose and potentially fix the problem yourself. With the right approach, you might just be able to avoid water waste and keep your plumbing in check until professional help is available.
1. What Random Toilet Refills Actually Mean
Random toilet refills, often referred to as ‘ghost flushing’, occur when a toilet tank loses water without being flushed. This loss of water triggers the fill valve, causing the tank to refill itself. Typically, this phenomenon indicates a leak somewhere in the system, most commonly at the flapper valve. If your toilet is refilling more frequently than every 20 minutes, it’s a clear sign that a closer inspection is needed.
Such leaks might be slow and subtle, but they can lead to significant water wastage over time. Understanding the underlying cause can help you address the issue promptly, potentially saving you gallons of water each day.
2. Why A Worn Flapper Valve Is Usually The Culprit
The flapper valve is a rubber component at the bottom of the toilet tank that lifts up when you flush, allowing water to flow into the bowl. Over time, the flapper can become worn, warped, or covered in mineral deposits, preventing it from sealing properly. This results in water leaking into the bowl, causing the tank to refill intermittently.
Given that flappers are made of rubber, they are susceptible to degradation from chlorine and other chemicals in the water. A flapper that’s not creating a tight seal can leak water at a rate of 0.5 to 1 gallon per minute, making it a significant source of water wastage if left unaddressed.
3. How To Safely Turn Off The Water Before You Do Anything Else
Before you begin any inspection or repair, it’s crucial to turn off the water supply to your toilet to prevent any accidental flooding. Locate the shut-off valve on the wall behind your toilet—it’s typically a small metal valve. Turn it clockwise until it stops to cut off the water supply.
This step ensures that you can safely work on your toilet without worrying about water continuously flowing into the tank or bowl, giving you the freedom to inspect and troubleshoot without added stress.
4. The Food Coloring Test: A Simple DIY Leak Detector
One of the simplest ways to determine if your flapper valve is leaking is to perform a food coloring test. To do this, remove the tank lid and add a few drops of food coloring into the tank water. Wait for about 15 to 30 minutes without flushing the toilet.
If the color has seeped into the toilet bowl, it’s a clear indication that the flapper is not sealing properly, allowing water to leak from the tank into the bowl. This test is a quick and effective way to diagnose the source of the problem.
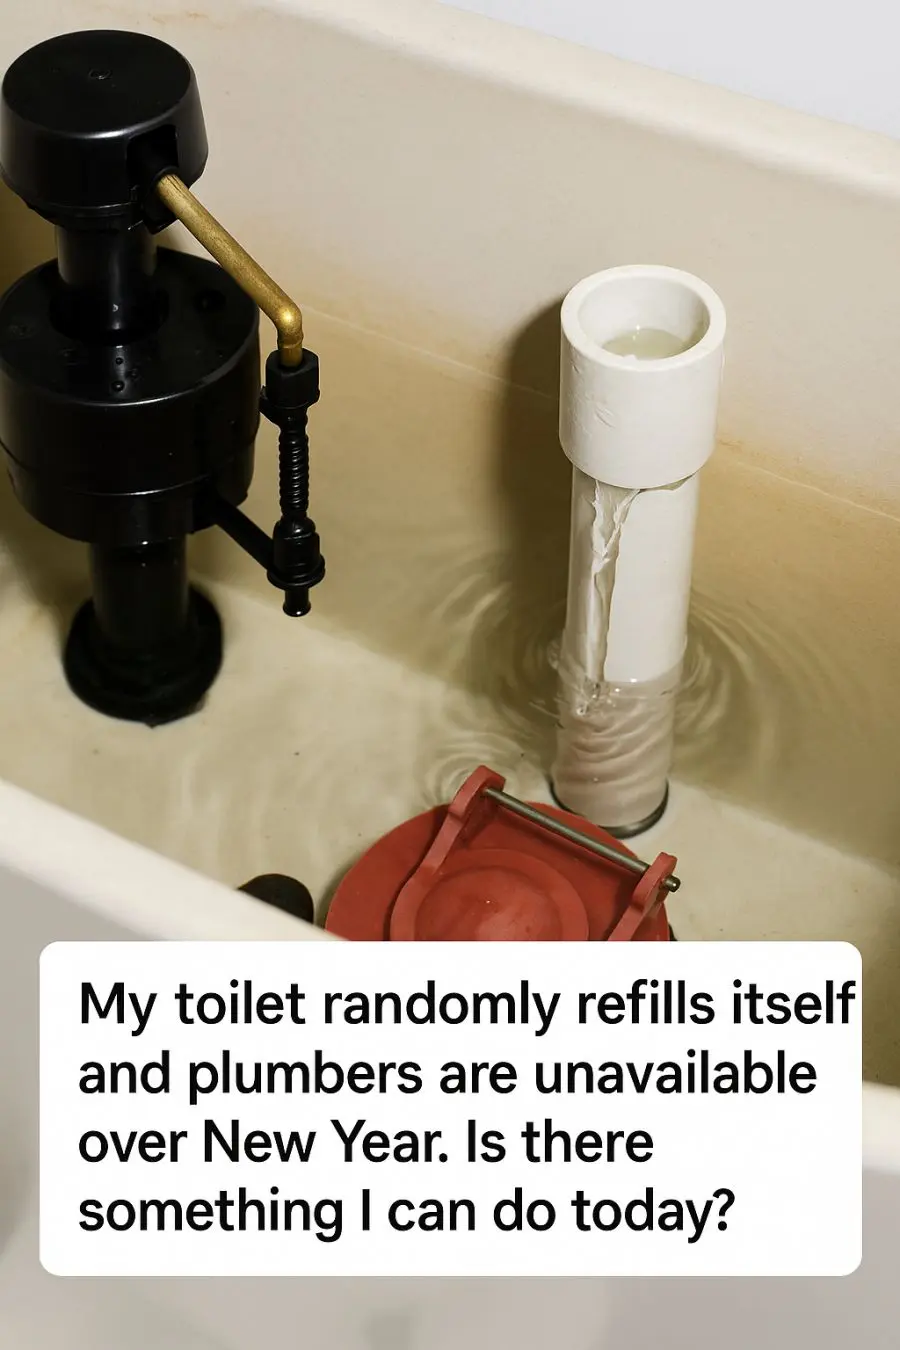
5. Opening The Tank: What You Should See And Check First
Once you’ve turned off the water supply and performed the food coloring test, it’s time to open the tank and take a closer look. Carefully remove the tank lid and set it aside. Inside, you should see several key components: the fill valve, the flapper, the overflow tube, and the flush handle mechanism.
Begin by inspecting the water level in the tank. It should be about an inch below the top of the overflow tube. If it’s higher, adjust the float to lower the water level. Check the flapper for any visible signs of wear or damage, such as cracks, warping, or buildup of slime and mineral deposits.
6. Inspecting The Flapper For Warping, Slime, And Mineral Buildup
Carefully examine the flapper for any signs of warping or a loose fit. A flapper that doesn’t sit flush against the valve seat can cause leaks. Run your fingers along the edges to feel for any slime or mineral deposits that might be preventing a tight seal.
If you notice any deposits, gently scrub them off with a soft brush or cloth. For mineral buildup, a vinegar soak can help dissolve the deposits. If the flapper is visibly warped or cracked, it will likely need to be replaced to ensure a proper seal.
7. Quick Cleaning Hacks To Temporarily Reseal A Leaky Flapper
If the flapper is dirty or has minor mineral deposits, a quick cleaning might temporarily improve its seal. Remove the flapper from the tank by unhooking it from the flush chain and the pegs on the overflow tube. Soak it in a mixture of warm water and vinegar for 30 minutes to loosen any mineral buildup.
After soaking, scrub the flapper gently with a soft brush to remove any remaining deposits. Rinse it thoroughly and reattach it to the tank. This temporary fix might reduce leakage until you can replace the flapper.
8. The Zip-Tie And Chain Adjustment Trick To Improve The Seal
If the flapper is in relatively good condition but still doesn’t seal properly, try adjusting the chain that connects the flush handle to the flapper. Ensure there’s about half an inch of slack—too much slack can prevent the flapper from sealing correctly.
Using a zip-tie, you can also secure the chain to prevent tangling. This simple adjustment can help the flapper close more securely and reduce leakage.
9. Using Petroleum Jelly Or Plumber’s Grease As A Short-Term Fix
For a temporary seal improvement, apply a small amount of petroleum jelly or plumber’s grease along the edges of the flapper. This can help create a tighter seal against the valve seat, reducing leaks until you can replace the flapper.
Be sure not to use too much, as excess grease can wash away quickly or affect other parts of the toilet mechanism. This is a short-term solution and should be used with the intention of a more permanent fix soon.
10. When To Replace The Flapper Yourself And How To Choose The Right One
If cleaning and minor adjustments don’t stop the leaks, it’s time to replace the flapper. Flappers are inexpensive and readily available at hardware stores. When choosing a replacement, bring your old flapper to ensure a proper fit, as flappers come in different sizes and styles.
Standard sizes are 2 inches and 3 inches, but it’s crucial to match the new flapper to your toilet’s specifications. Installation is straightforward—simply unhook the old flapper and attach the new one, ensuring a snug fit on the valve seat.
11. How Much Water (And Money) You’re Wasting If You Ignore It
A leaking toilet can waste a significant amount of water—up to 200 gallons per day. Over the course of a month, this can add up to thousands of gallons, leading to increased water bills and unnecessary environmental impact.
Addressing the issue promptly not only conserves water but also saves you money in the long run. A simple flapper replacement can often resolve the issue and prevent further water wastage.
12. Emergency Workarounds If You Can’t Fix It Today
If you’re unable to fix the flapper immediately, consider turning off the water supply to the toilet when it’s not in use. This prevents continuous refilling and water wastage. Alternatively, place a weight, like a small rock, on top of the flapper to help it seal more securely.
These temporary measures can help mitigate water loss until you can replace the flapper or call a plumber for assistance.
13. When A ‘Random Refill’ Signals A Bigger Problem Than The Flapper
While a faulty flapper is often the culprit behind random refills, it’s not the only possible issue. If replacing the flapper doesn’t resolve the problem, the fill valve or overflow tube might be malfunctioning. A fill valve that’s not shutting off properly can cause continuous refilling.
In such cases, it may be necessary to replace the fill valve or consult a professional plumber to address more complex plumbing issues. Ensuring all components are functioning correctly is crucial for maintaining an efficient and leak-free toilet system.
