Imagine stepping into your bathroom to start your day, and the moment you flip the switch, you’re met with an unexpectedly loud, almost jarring sound from your bathroom fan. It’s New Year’s Day, and all repair services are closed, leaving you to deal with the problem alone. A noisy bathroom fan can be more than just an annoyance; it might be a sign of underlying issues that need attention.
Understanding the potential causes of a noisy bathroom fan can empower you to take the first steps in diagnosing and potentially resolving the issue yourself. In this article, we’ll walk you through some practical steps you can take to troubleshoot your bathroom fan, ensuring that you can enjoy peace of mind even when professional help isn’t immediately available.
1. Start With Safety: Power Off And Basic Precautions
Before you begin any troubleshooting, safety must be your first priority. Ensure the power to the fan is completely turned off to prevent any electrical hazards. This means not just flipping the wall switch but also turning off the circuit breaker that controls the fan. If you’re unsure which breaker controls the fan, it’s safer to turn off power to the entire bathroom.
Once the power is off, gather some basic tools such as a screwdriver, flashlight, and a sturdy step ladder to help you reach the fan. Consider using safety goggles and a dust mask if you anticipate dealing with accumulated dust and debris. These precautions will help you safely and effectively inspect and clean your bathroom fan.
2. Listen Closely: Identify What Kind Of Noise You Hear
Different noises can indicate different issues with your bathroom fan. Start by turning the fan back on momentarily to listen closely to the sound it makes. A rattling noise might suggest loose parts or debris caught in the fan. A humming sound could mean the motor is straining, possibly due to a blockage or motor issue.
A grinding noise is typically more serious, suggesting that the fan blades might be hitting something or that the motor bearings could be failing. By identifying the specific type of noise, you can better understand where to focus your inspection efforts.
3. Quick Visual Check: Cover, Grille, And Loose Screws
Begin with a visual inspection of the fan cover and grille. Use your screwdriver to carefully remove the cover and check for any visible signs of damage or wear. Look for loose screws that might be causing the cover to rattle against the ceiling.
Check the condition of the grille. If it’s warped or cracked, it might not be securely fastened, contributing to noise. Tighten any loose screws you find, and ensure that the cover and grille are properly aligned and seated when you reattach them.
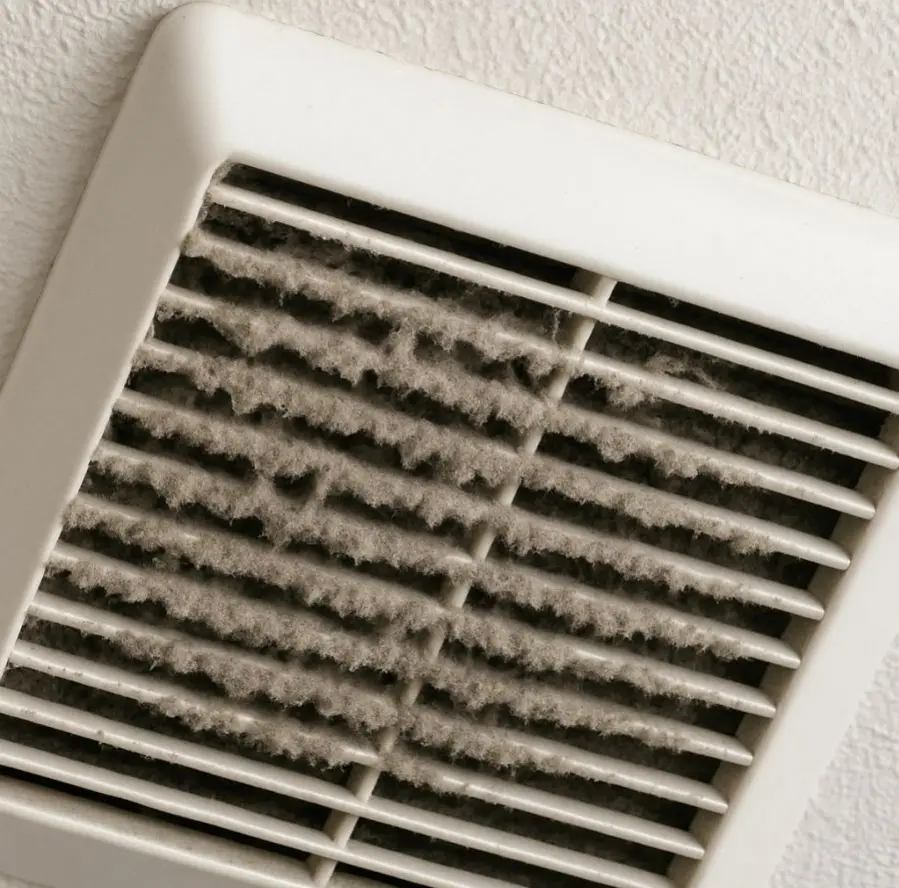
4. The Dust Buildup Culprit: Cleaning The Fan Cover
Dust buildup is a common cause of noisy bathroom fans. Once the cover is removed, use a vacuum with a brush attachment or a can of compressed air to remove dust from the cover and fan housing. Make sure to clean both the inside and outside of the cover.
A clean cover not only reduces noise but also improves the fan’s efficiency by allowing better airflow. Regular cleaning of the fan cover, ideally every few months, can prevent future noise issues.
5. Deep Dust Removal: Carefully Cleaning The Fan Blades
With the cover off, you can access the fan blades. Use a soft cloth or a small brush to gently clean the blades. Be careful not to bend or damage them, as this can cause imbalance and increase noise.
For more thorough cleaning, you might need to remove the fan unit from its housing. Refer to the manufacturer’s instructions for removing the fan blades if necessary. Ensure all dust and debris are cleared from the blades and surrounding areas.
6. Check For Wobble: Is The Fan Wheel Off-Balance?
A fan that wobbles during operation can be significantly noisier. Gently spin the fan by hand to check for any wobble or imbalance. If the fan wheel seems unstable, it might need to be repositioned or tightened.
Ensure that the fan is mounted securely and that all screws and bolts are tightened. An off-balance fan can be more than noisy; it can also cause additional wear on the motor over time.
7. Inspect For Obstructions: Debris, Insects, And Hidden Blockages
Obstructions within the fan housing can lead to increased noise. Shine your flashlight into the fan housing to inspect for any debris or foreign objects that might have been drawn into the fan.
Insects and small animals sometimes find their way into bathroom vents, especially if the exterior vent cover is damaged or missing. Check for any nests or blockages and remove them carefully using gloves or tools to avoid contact.
8. Assess The Ductwork: Loose, Kinked, Or Vibrating Ducts
The ductwork connected to your bathroom fan can also be a source of noise. Access the attic or crawl space if possible, and inspect the ductwork for any signs of damage or loose connections.
Ensure that the duct is properly supported and not kinked or twisted, as this can restrict airflow and cause the fan to work harder, amplifying noise. If the duct is vibrating, consider adding padding or adjusting the supports to dampen the noise.
9. Vibration Hacks: DIY Padding And Noise-Dampening Tricks
If vibrations are a significant source of noise, consider adding some DIY padding. Use foam tape or rubber gaskets to cushion the areas where the fan meets the ceiling or ductwork.
You can also try placing a small piece of rubber or dense foam between the fan housing and the ceiling joists to absorb vibrations. These simple fixes can often reduce noise levels significantly without requiring major adjustments.
10. When Lubrication Helps (And When It’s A Red Flag)
In some cases, lubricating the fan motor can help reduce noise, especially if the noise is due to friction or dry bearings. Use a light machine oil and apply it sparingly to any moving parts, following the manufacturer’s guidelines.
However, if you’ve never needed to lubricate your fan before, this could be a red flag indicating wear and tear. Excessive need for lubrication might mean the motor is wearing out, and professional inspection could be necessary once services are available.
11. Smell And Heat Check: Warning Signs Of Motor Trouble
Pay attention to any unusual smells, like burning or overheating odors, which can indicate motor trouble. Carefully touch the fan motor to see if it feels excessively hot, as overheating can be a sign of electrical issues.
If you detect any burning smell or excessive heat, it’s best not to use the fan until a professional can inspect it. These signs suggest potential electrical problems that could pose a fire risk if not addressed promptly.
12. Temporary Workarounds Until Repair Services Reopen
If the noise is bearable and there are no immediate safety concerns, consider using the fan sparingly until you can get a professional to look at it. If the fan is critical for ventilation, try using an alternative method like opening a window or using a portable fan to help with airflow.
In some cases, simply running the fan for shorter periods or at different times can reduce the impact of the noise until a more permanent solution is available.
13. When To Stop DIY And Call A Professional
While DIY fixes can be effective for minor issues, there are times when it’s best to call a professional. If your attempts to fix the noise have not worked, or if you suspect electrical problems, it’s crucial to get a professional assessment.
Persistent noise, especially if coupled with burning smells or overheating, warrants urgent professional attention. Wait until repair services are available to ensure your fan is safe and functioning correctly.
