
In the world of home decor, the rustic farmhouse style continues to captivate with its charming blend of simplicity and warmth. One of the most versatile pieces you can add to your home is a tiered tray, perfect for displaying seasonal decor, organizing kitchen essentials, or serving treats at a gathering. By repurposing old cake pans from Goodwill, you can create a unique and breathtaking home accent that not only saves money but also adds a personal touch to your decor. This DIY project is perfect for those who love to upcycle and breathe new life into forgotten items.
This Rustic Farmhouse Tiered Tray can be styled in various ways to complement your home. Place it on a kitchen island or dining table as a centerpiece, adorned with small potted plants, candles, or seasonal decorations. In the bathroom, it can hold toiletries and hand towels, adding a touch of rustic elegance. For a more cohesive look, pair it with other farmhouse elements like wooden signs, galvanized metal accents, and burlap textiles. The neutral tones and vintage appeal of the tray will blend seamlessly with both modern and traditional interiors.
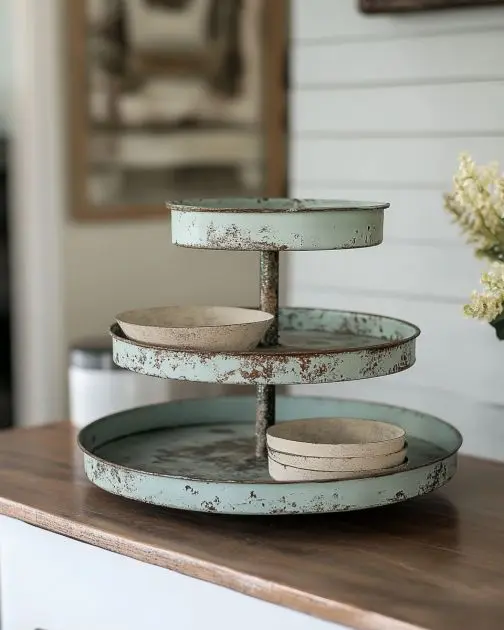
Rustic Farmhouse Tiered Tray from Old Cake Pans
Materials
3 old cake pans (varying sizes: small, medium, large)
2 wooden candlesticks or spindles
Wood glue or strong adhesive
Chalk paint or spray paint (in a color of your choice)
Sandpaper (medium grit)
Clear sealant (optional)
Paintbrush or foam brush
Directions
Start by cleaning the cake pans thoroughly to remove any residue or rust.
Use sandpaper to gently scuff the surface of the cake pans and candlesticks. This will help the paint adhere better.
Paint the cake pans and candlesticks with chalk paint or spray paint. Apply multiple coats if necessary, allowing each coat to dry completely before applying the next.
Once the paint is dry, lightly sand the edges and surfaces to create a distressed, rustic look.
Using wood glue or a strong adhesive, attach the base of the smallest candlestick to the center of the largest cake pan. Allow it to dry completely.
Attach the medium-sized cake pan to the top of the first candlestick, ensuring it is centered. Let it dry.
Repeat the process with the second candlestick and the smallest cake pan, creating a tiered effect.
Once all pieces are securely attached and dry, apply a clear sealant if desired to protect the finish.
Allow the entire piece to dry overnight before using it to ensure the adhesive is fully set.
Variations & Tips
To personalize your tiered tray, consider experimenting with different paint colors or finishes. A whitewashed look can add a shabby chic touch, while a darker stain might offer a more industrial vibe. You can also embellish the edges of the cake pans with stencils or decals for added detail. If you prefer a more natural look, leave the wooden candlesticks unpainted and simply seal them with a clear coat. For added stability, consider using a drill to secure the candlesticks to the pans with screws, especially if you plan to use the tray for heavier items.
