Cooking meat to perfection is a skill that many home cooks strive to master. However, one common challenge that often arises is achieving that coveted golden-brown crust on the surface of the meat. Instead of a beautiful sear, you might find your meat turning an unappetizing gray. What could be causing this frustrating phenomenon?
Understanding the science behind meat browning can transform your cooking results. From the choice of pan to the temperature of the meat and everything in between, each factor plays a critical role in the final outcome. Let’s delve into the details to uncover why your meat might be turning gray instead of brown and how to ensure a perfectly seared piece every time.
1. What Actually Makes Meat Turn Brown in the Pan
The browning of meat, known as the Maillard reaction, is a chemical reaction between amino acids and reducing sugars that gives browned foods their desirable flavor. This reaction typically occurs at temperatures above 285°F (140°C). It’s not just about color; it’s also about flavor and aroma. To achieve this, the surface of the meat must be dry and the pan hot enough to reach these temperatures quickly. A proper sear develops a complex network of flavors that are both savory and aromatic.
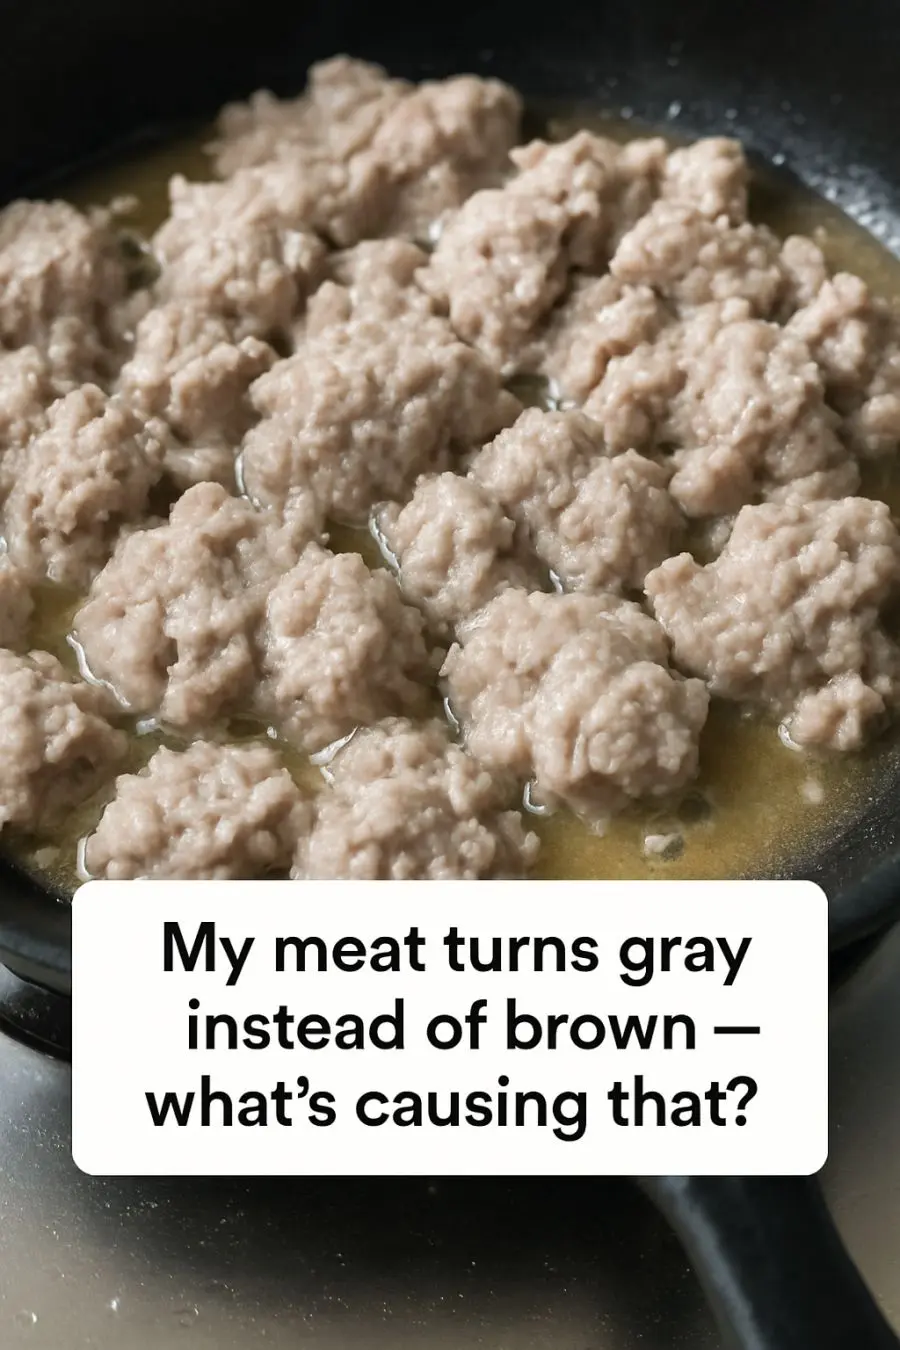
2. How Pan Overcrowding Traps Steam and Turns Meat Gray
One of the most common mistakes leading to gray meat instead of brown is overcrowding the pan. When too much meat is packed into a pan, the heat causes the moisture in the meat to turn into steam. This steam gets trapped between the pieces, causing them to cook via steaming rather than frying. To avoid this, ensure there is adequate space between each piece of meat. Ideally, there should be at least an inch of space around each piece to allow for proper air circulation and prevent steaming.
3. The Role of Moisture: Patting Meat Dry vs. Soggy Surfaces
Moisture is the enemy of browning. If meat is too wet, the moisture needs to evaporate before the Maillard reaction can begin, leading to steamed, gray meat. Patting meat dry with paper towels before cooking helps remove excess surface moisture. This step is crucial, especially when dealing with meats that have been marinated or previously frozen. By ensuring the surface is as dry as possible, you allow the meat to sear properly, resulting in a rich brown color.
4. Pan Temperature: Why “Medium” Heat Often Isn’t Hot Enough
Cooking with insufficient heat is another factor that can prevent browning. Many recipes suggest ‘medium’ heat, but this can often be misleading. Depending on your stove and pan, medium heat might not be enough to achieve the high temperatures needed for the Maillard reaction. An infrared thermometer can help you determine when your pan is adequately heated, typically around 375°F (190°C) or higher for optimal browning.
5. Choosing the Right Pan: Nonstick, Stainless, or Cast Iron?
The type of pan you use can significantly affect meat browning. Nonstick pans, while convenient for certain applications, do not conduct heat as effectively as stainless steel or cast iron. Cast iron and stainless steel pans retain heat better and provide a more even cooking surface, which is ideal for searing. When choosing a pan for browning meat, opt for those that can withstand high temperatures and distribute heat evenly.
6. Oil Mistakes That Lead to Pale, Steamed Meat
The choice and application of oil can also impact browning. Oils with high smoke points, such as canola or grapeseed oil, are preferred for searing because they can withstand the high temperatures needed to brown meat without burning. It’s also important not to use excessive amounts of oil; a thin layer is typically sufficient. Too much oil can create a barrier that prevents the meat from making direct contact with the pan, leading to steaming rather than searing.
7. Flipping Too Often: How Constant Movement Prevents Browning
Constantly flipping meat can disrupt the browning process. To develop a proper crust, meat needs time to contact the hot surface of the pan without interruption. Ideally, you should allow the meat to cook undisturbed for several minutes on each side until a crust forms. Flipping should be minimized to once or twice depending on the thickness of the meat to ensure even cooking and browning.
8. Starting With Cold Meat: Temperature Shock and Gray Exteriors
Starting with meat straight from the refrigerator can cause it to turn gray. Cold meat lowers the temperature of the cooking surface, which can prevent proper browning. Allowing meat to rest at room temperature for 15-20 minutes before cooking helps it to sear more effectively. This practice reduces the temperature shock and helps the meat reach the desired brown color more quickly.
9. Thickness, Cut, and Fat Content: How Different Meats Brown Differently
The thickness and cut of meat also influence browning. Thicker cuts require longer cooking times, which can be beneficial for achieving a deep brown crust. Additionally, meats with higher fat content tend to brown better due to the fat rendering and aiding in the Maillard reaction. Understanding the characteristics of the meat you are cooking can help you adjust your technique to get the best results.
10. Marinades, Sauces, and Sugar: When Seasoning Sabotages Searing
While marinades and sauces add flavor, they can also contain sugars and moisture that may inhibit browning. Sugars in particular can burn quickly, leading to a bitter taste rather than a savory sear. If using a marinade, it’s often best to pat the meat dry before cooking and apply sauces towards the end of the cooking process to prevent burning and ensure proper browning.
11. Stove Power Limits: Electric vs. Gas and the Heat Your Burner Can Really Deliver
The type of stove you use can affect how well you can brown meat. Gas stoves tend to heat up faster and offer more precise temperature control compared to electric stoves, which may take longer to reach high temperatures. Understanding the limitations of your stove can help you adjust your cooking technique to ensure that your pan reaches the necessary temperatures for browning.
12. Viral TikTok Hacks for Browning Meat — What Works and What Backfires
Social media is full of tips and tricks for cooking, but not all are effective for browning meat. Some hacks suggest using unconventional methods, such as using a blowtorch for finishing or adding sugar for color, which can sometimes lead to inconsistent results. It’s important to critically assess these methods and stick to tried-and-true techniques that are grounded in culinary science to achieve the best results.
13. Food Safety vs. Color: Is Gray Meat Still Safe to Eat?
While gray meat may not be visually appealing, it is not necessarily unsafe to eat. The color change is more about the cooking process than food safety. However, ensuring that meat is cooked to the appropriate internal temperature is crucial to safety. Using a meat thermometer to check that beef reaches at least 145°F (63°C) and poultry 165°F (74°C) will ensure it’s safe to consume, regardless of exterior color.
14. A Step-By-Step Game Plan to Get Deep Brown, Flavorful Crust Every Time
To achieve a perfect brown crust every time, start by selecting the right cut of meat and ensure it’s at room temperature. Use a heavy pan, such as cast iron, and preheat it to around 375°F (190°C). Pat the meat dry and season it as desired. Use a high smoke point oil and avoid overcrowding the pan. Allow the meat to sear undisturbed until a crust forms, then flip once, cooking to the desired doneness. Rest the meat after cooking to retain juices and enhance flavor.
